Featuring Premium Parts from
Half completed projects have always bothered me. Even little things like unhidden wiring, missing hardware, or mismatched components drive me nuts.
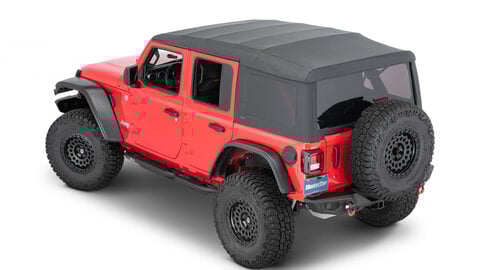
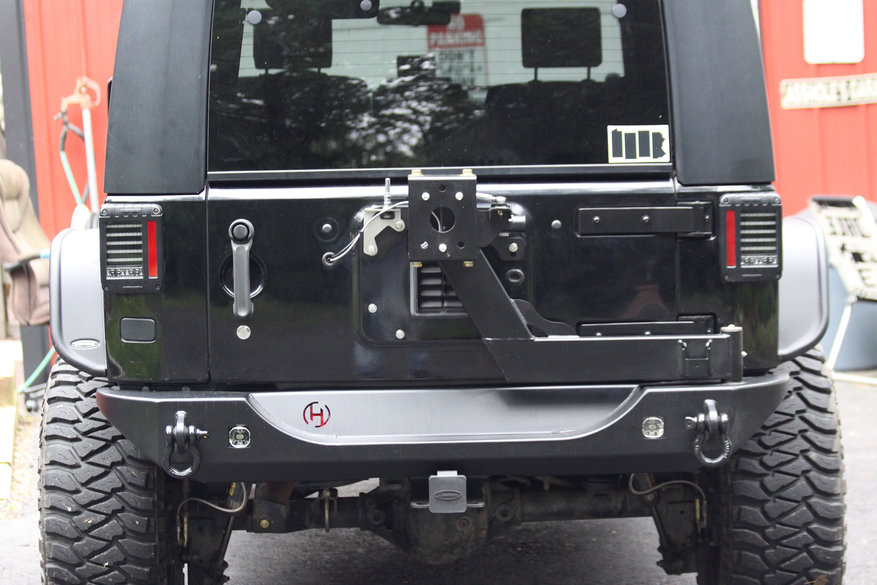
In my ongoing war against faded gray factory plastic components, the rear bumper on Project Snake Eyes stood out as a glaring reminder something still needed improvement.

While it hadn’t absorbed the same rock and ice impacts that my front bumper had, it certainly showed its age. Aside from the fact that it obviously isn’t made for severe duty use, the ABS plastic had faded badly in the sun.
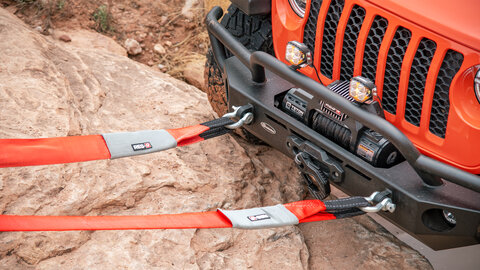
I have needed a rear recovery point twice on the trail to pull people out of some nasty stuff, and my factory rear hitch worked in a pinch. I wanted to keep the hitch for towing and cargo platform use, but adding more durable shackle locations was a necessity. I also wanted a provision to use 3” cube lights as a combination reverse/rear work light with my new bumper.
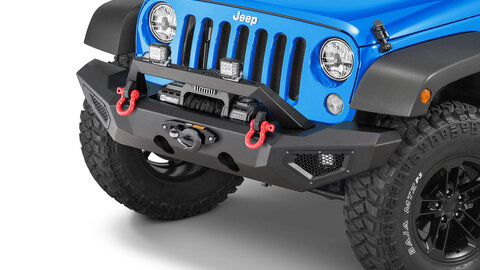
I had seen some “spy photos” of Hyline Offroad's prototype mid-width Ridgeline bumpers before I decided on their front mid-width bumper, which is currently on Project Snake Eyes. I would be lying if I said this wasn’t a strong influence on my decision as the lines match the rear JK tub perfectly and provide corner protection without sacrificing clearance or significantly reducing departure angles.
These bumpers touched on every point of my requirements without a shred of compromise.
With the tire carrier equipped version I am installing, the Hyline Swing Away Tire Carrier opens with the tailgate (no secondary latch needed!) and is capable of supporting up to a 38” spare tire. There is also a pre-drilled hole for mounting a CB antenna or trail flag.
It can also be upgraded further with a Rotopax mounting bracket allowing you to hold up to 4 gallons worth of Rotopax containers, or a High-Lift Jack Mount. There is only room for one setup or the other, so choose wisely!
The tire carrier is also compatible with Hyline’s Oversized Spare Tire 3rd Brake Light, which shines through the center hub hole on your spare for a low profile look. It also works with license plate relocation kits that go through the spare, which I have already been using for a while.
When the first run of those new Ridgeline bumpers was in production, I was able to get a firsthand look at how Hyline produces their top quality Jeep components at their Perkasie, Pa. facility.

All of Hyline Offroad’s products are designed and built in house. The standard Ridgeline bumper and the “tire carrier ready” version both share the same profile, high quality manufacturing process, and extremely durable e-coat and powder coated finish. No drilling or permanent modification to your Wrangler is required to install either of these bumpers.
Ridgeline bumpers start as USA-made 3/16” steel plate, and are precisely laser cut from sheets by a machine running 24 hours a day.

After cutting is complete, the parts are punched out of the sheets and formed using a CNC press brake. In the following picture, you can see the slots cut into the bumper’s face for recovery points, which are each welded on both the front and back sides, and are tied in to your Jeep’s frame for added strength.

The bumper components are then MIG welded together by hand, and are thoroughly inspected for structural integrity before moving on to the next step.


Each bumper is then finished by hand to smooth welds and remove surface imperfections, and then the bumpers enter a three-stage coating process. This added attention to detail is something that makes Hyline Offroad’s products look so incredible in person. Each bumper receives a thorough zinc-phosphate rinse and cleaning, before being E-coated and powder coated in a lightly textured black. This produces a uniform finish that will stand up to harsh environments like no painted coating can, and matches the textured look of factory components (and my Bushwacker Flat Flares) perfectly.

Many manufacturers powder coat bare steel with very little surface preparation. So while they may look good right out of the box, they will not have the longevity of a Hyline product. The added quality is well worth the investment if you care about performance as well as lasting good looks on your Wrangler.
After the coating process is complete, the bumpers and associated parts are loaded into custom made packaging that protects the bumper from damage during shipping.
Hyline Offroad also maintains a comprehensive overstock at their facility to help keep product flowing during times of high demand. This additional stock also eliminates backorder situations on their products.

Note: As it will be exposed following removal of your factory spare tire carrier, you may want to consider a new tailgate exhauster for your JK. The rubber flaps on my 2008 had disintegrated completely. There are two models available, one for 2007-2009 JKs, and a smaller one for 2010-2017 editions.

Tools and supplies required:
For Ridgeline bumper installation:
- 16mm socket
- 18mm socket (if you have a factory tow hook installed)
- ¾” socket
- Torque wrench
- Matte black rust-inhibiting primer (recommended for older Jeeps)
Optional:
- 3” cube lights- I used Rigid Industries Radiance Pods, the fit was flawless
For Swing Away Tire Carrier installation:
- 13mm socket
- ¾” socket
- ½” socket
- 9/16” socket
- T20 Torx bit
- ½” open ended wrench
- 7/16” open ended wrench
- 3/16” Allen key or socket
- 5lb. hammer, vice or hydraulic press (to install lug studs in tire carrier)
- Grease gun
- Waterproof grease
Optional:
- Kentrol Tailgate Plug Set
- Tailgate Exhauster if beat up (see note above)
- Hyline Offroad Oversized Spare Tire 3rd Brake Light
- ¾” D-Ring shackles of your choice
Bumper procedure:
Start by removing the factory bumper. This will take very little time, and will be an exceedingly rewarding task. If you have a factory trailer hitch, it will not need to be removed.

Using a 16mm socket, remove the two bolts per side connecting the bumper bracket to the frame just behind the rear tire. These bolts should be saved for reuse with the new Hyline bumper.

Next, remove the bumper bolts behind the rear of the bumper. Be sure to support your bumper to keep it from falling, even though it doesn’t weigh very much. With a hitch installed it will balance on top.

With nearly a decade of driving on salted winter roads, my frame, bumper support and hitch definitely looked a little haggard.

Some of these parts will show even with the new bumper installed, so I took the time to clean and paint each one. With a newer Jeep, this step may not be necessary. At the very least, clean out any dirt and debris from the inside of the frame so it won’t be trapped behind the Hyline inner frame mounting brackets.

Note: If you’re installing rear cube lights with the bumper, now is the time best to install and align them. I went with the Rigid Industries Radiance Pods with white backlighting, but didn’t have them on hand the day I installed the bumper.

With either Ridgeline bumper, a full removal to install cube lights down the road is not necessary. Removing the mounting bolts and sliding the bumper back on the frame will give you more than enough room to accomplish this task. With the tire carrier installed, the tie rod joint linking the carrier to the tailgate will also need to be disconnected, and removal of your spare will make the whole assembly weigh a lot less.
You can use the supplied washers to adjust the height of whatever cube lights you install on the internal welded slot tabs, ensuring a perfect fit.
Insert the inner frame mounting brackets into the frame with the welded nuts facing outwards.

Now you’re ready to test fit your new Ridgeline bumper. The precise tolerances used in manufacturing and design let it slide on smoothly with no gaps. If you’re installing cube lights now, slide the bumper back out so you can finish up your wiring.

If everything looks good, install the provided grade 8 bumper bolts (2 per side) and the factory bolts you earlier removed from the frame. Don’t tighten anything fully at first, as you may need a little wiggle room for final alignment.

Once all the bolts are started, torque the new Hyline bolts to 100ft/lbs with a ¾” socket, and the factory bolts to 50ft/lbs., with a 16mm socket.
Swing Away Tire Carrier Procedure:
I already had my factory spare tire carrier removed, so I’m skipping a few steps here. I also relocated my third brake light and tag lights using a Rock Hard 4X4 Parts License Plate Relocation Bracket . Since everyone’s needs and current upgrades are different, no third brake light solution is included in this kit. Have no fear though, Hyline offers a super slick and low cost Oversized Spare Tire 3rd Brake Light if you don’t already have an aftermarket third brake light solution. It shines through the hub hole on your spare with a bright red LED light, without having to stick up past the tire itself.
With a factory tire carrier, all the 13mm bolts must be removed around the perimeter to allow removal. A T-20 Torx bit will be used to remove the factory third brake light wiring from the carrier. Once these are taken out, pull all the factory tire bumpers you still have installed out of the holes. This is where two of the three body plugs from the Kentrol Tailgate Plug Set come into play - if you’d like to cover the holes left behind by these bumpers. The third plug is for filling the hole left behind if you relocated your third brake light wiring.
Start preparing the tire carrier by using the 7/16” wrench to install the supplied grease fitting. Also pop the plastic cap into the open tubing end of the carrier.

For the next step, hand thread the four 13mm bolts you removed from the factory tire carrier to install the supplied tailgate bracket. In this picture, I have a set of stainless steel bolts (M8x1.25x30mm) and washers I purchased locally for another project, as well as longer bolts for my Quadratec Stainless CB Antenna Rear Tailgate Mount being used to install the plate. Either way works, I just used what I had (since I unfortunately threw out the factory ones). I also added bolts and washers to the bottom holes because I am apparently made of money. If you have an exhauster as mentioned above, then install it now. Don’t tighten the bolts yet though, as we need them loose for final adjustment.

Install the first ball joint rod end on the rear bracket with the supplied hardware.

Install the pivot pin with the keyed end facing down and, using the supplied washers (flat and lock), start the grade 8 bolt by hand before fully seating the pin. With it fully seated, there is very little room to start the bolt; so getting it in place without the weight of the carrier fighting you is a great idea. Now, completely cover the pivot pin with waterproof or white lithium grease.

Put one brass washer onto the greased pivot pin, then slide the tire carrier down on top. The second brass washer goes on top.

The stainless cap, flat washer, star washer and button head bolt top off the whole assembly. Be sure to tighten with a 3/16” Allen tool before moving on to the lower bolt, as it sets the depth of the entire assembly.

Tighten the lower bolt fully and then check operation. The carrier should swing smoothly with no up or down wobbles.
Test fit the two supplied plastic spacer bushings to see which one allows the carrier to sit most parallel with the tailgate. Install loosely with supplied hardware as detailed in the instructions.

Install the second threaded ball joint end on the tire carrier using the supplied hardware, as well as the matched thin nut. There are two nuts supplied, and one of the ball joint ends is reverse threaded to allow adjustment. Luckily, trial and error will yield the correct nut 50% of the time - as it only works one way.
Install the internally threaded aluminum connector rod onto the threaded ends of both ball joints simultaneously. Just as before, it only works one way. Trust me, this is actually easier than it sounds. The goal here is to have close to the same amount of exposed threads on both sides for maximum strength.

Moving the connector one direction will tighten the carrier against the tailgate, moving it the other way will push it further out. Once you have it set to the proper depth, tighten both nuts against the adjustment connector rod to keep it from moving with the 7/16” and ½” wrenches.
Now, tighten the plastic alignment block hardware and the four tailgate plate bolts if everything looks square.

Press the wheel studs into the carrier plate for the correct bolt pattern (mine is 5x5) using a press, bench vice, or a hammer and some determination. Make sure those studs go in straight, or they will really fight you.

Install supplied hardware for the carrier plate by hand, and test fit your spare. Alternatively, you can get a close approximation by measuring from the back of your wheel hub to the furthest inner edge of your tire. Compare that measurement to the offset between the face of the tire carrier plate and the diagonal arm of the carrier, to get you close. If you prefer the trial and error method with a heavy spare, you can consider it a crossfit workout.

Once the depth of the carrier is set, tighten all hardware. Double check all your electrical connections for your third brake light solution.

With the spare installed, check operation and adjust as necessary. I was very impressed with how well this carrier holds the weight of an oversized spare, while still smoothly opening and closing with only the factory tailgate handle. Fairly soon, this bumper will be upgraded with a Hyline Rotopax mount to carry extra fluids on longer offroad treks.
Take your Wrangler out for a road test to check for vibrations. Or better yet, take it on a trail test.

Stay tuned to the Quadratec Channel for further lighting and functionality upgrades on Project Snake Eyes - coming soon!