by Scott Ammerman
Torque Correspondent
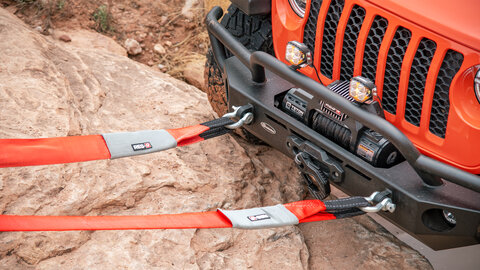
Seeing a new Power Tank box at the end of your driveway, or on the doorstep, is always exciting. This one was sent to my address for a friend who is in the middle of moving — a delay with one of the system components put his estimated shipping date right when he was planning to drive between states with a moving van.

I’m going to get the Power Tank set up and have it filled for him before our next off-road adventure, and show you, my faithful readers, just how easy it is to accomplish. I’ll even detail how to use it once we’re all charged up and ready to rock.

Compared to setting up a conventional onboard air system, getting a Power Tank setup ready for first use is astonishingly simple. Aside from having to get it filled, it is very nearly ready to go “right out of the box” with a few quick tasks.
These systems arrive almost completely assembled, and there are no wires to run, as well as only a few fittings to worry about.
There are just a few things to be aware of that will make your life easier over the course of ownership, and a few additional low-cost accessories you may want to consider.
Step 1: Weigh in
Weighing your tank before doing anything else is critical to set your baseline, or you’ll never know how much liquid CO2 is left. While the supply pressure gauge is there for a reason, its reading stays fairly constant from the beginning of the tank to the end, changing almost exclusively based on temperature.

On the bottom of the Power Tank’s label, there is a spot to record your empty weight, and two checkmark choices to record whether the regulator and handle are included in this reading.

On my system, I weighed it with those items included, as that would most often be the way I would check it before leaving home. I have two bottles that I swap between based on how much charge is left. Depending on the length of the trip and how much CO2 I think I’ll need, I can make a decision as to which one to take.

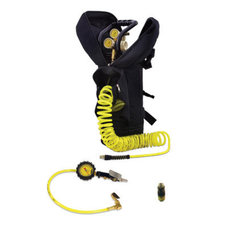
This particular system is a PT10 Track Pack with a Speed Bag, 30-foot SuperFlex coiled hose, a Super Coupler and 60 psi analog inflator. By adding the Power Tank SCL-1502 T-Scale, you can wrap the strap around the handle and know how much your setup weighs with no charge at all.
If for some reason you skip this step — next time your bottle is fully depleted you can remove the regulator and open the valve slightly to make sure there is zero charge, then weigh and record the correct value on your label.
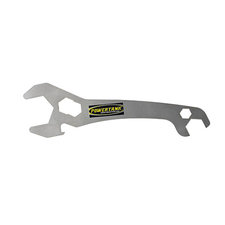
The Power Wrench 4 is Recommended Accessory #2 and allows you to easily remove the regulator without damaging the regulator nut. It is made from stainless steel, and will also work 9/16” and ⅝” fittings, as well as a few other specialized compressed products, including capped bottles of carbonated beverages.

While you can certainly use a correctly sized or adjustable wrench to perform this same function, the best tool for the job is the one you have within reach. Not only does the Power Wrench prevent over-tightening of the nut by having a built-in bend point, but it can be stored right next to my tank in the MOLLE webbing of my Bartact rear seat cover.

And why don’t you want to over-tighten that nut? Well, there is a never-lose seal inside the regulator that can be damaged by excessive torque, and if it splits it could cause a leak. Spares are available (and I ordered one to carry in case of a failure) but in four years of using my regulator, the seal hasn’t been damaged because I always used a Power Wrench. There isn’t much room inside the Power Grip handle to turn a conventional wrench anyway, so this low-cost accessory is worth having in your vehicle.
Maximum torque on the regulator nut is 15 lb-ft, or about as much force as you can generate with two fingers on a wrench.
Step 2: Remove and weigh your regulator
I know this seems odd since the regulator doesn’t hold a charge. This step can actually save you some time if you do end up with a second tank, or leave the regulator at home and want to check the charge before leaving your filling point.

The regulators are a little over one pound, but vary a bit based on whether the gauges are liquid-filled or not. Knowing exactly how much it weighs will allow you to do some quick math if you weigh the bottle with the regulator removed, and still know how much charge you have left.

As a fairly recent production upgrade, all of the currently made Power Tank regulators include liquid-filled gauges with rubber boots. On the left of this picture is my original HP250i regulator with standard gauges, and on the right is the new model. The XP400 regulators have come standard with liquid-filled gauges for years, but the new models include the same rubber boots for added protection.
Knowing the weight of my regulator has saved me a bunch of time and trouble, and recording its weight while you have everything out now is simple.
Step 3: Assemble your hose

The optional upgraded Super Coupler fitting is included in this hose kit, as well as the ¼ industrial male plug needed to attach to the hose so you can use it. The standard Power Flow 3 coupler comes with the more basic Power Tank setups, and it attaches the same way.

A ⅝-inch wrench and a ¾-inch wrench are used to tighten the super coupler end, and two ⅝-inch wrenches are used for the male plug on the other end.

This is a simple step with hand tools, and there is thread sealant on the ends of the hose to ensure leak-free performance once everything has been assembled.
Step 4: Get the tank filled
Keep the included 8mm Allen wrench in your bag or tool kit (I labeled mine) in case your filling station asks that you remove or rotate your Power Grip handle — most don’t, but the filling equipment they have may interfere with the process. This isn’t a special tool, but having a dedicated one that stays with your tank is a solid practice.
Finding a local place that can Transfill your tank while you wait is ideal, and even in remote locations you can usually find a place that services fire suppression systems to help you.
Step 5: Mount up and hit the trails
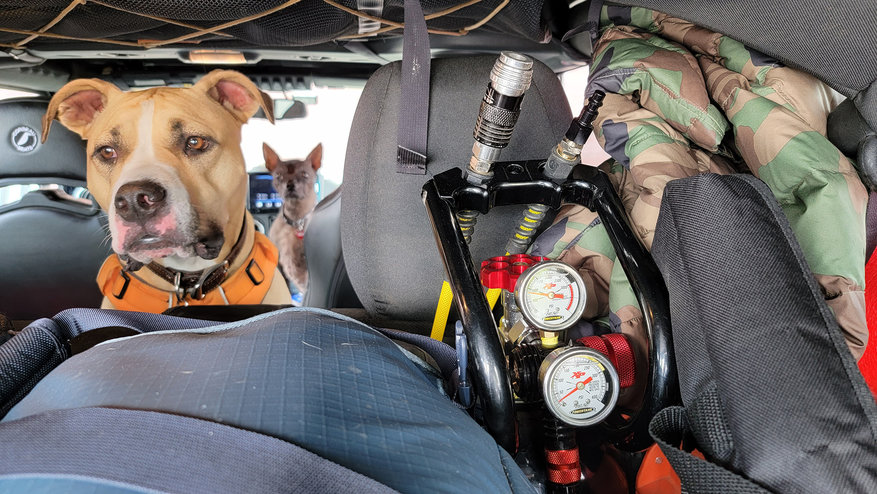
For this system, we included the Speed Bag which is made of heavy-duty ballistic nylon with box stitched webbing and nearly indestructible YKK zippers. This storage solution made the most sense for my friend because he intends to use it in multiple vehicles, as well as keeping the whole thing portable if he needs to help a disabled vehicle while guiding trail rides. It offers a whole lot of extra protection while handling it in adverse environments.

Every part of his Power Tank system will have a place to live in this bag, including the 30-foot hose and inflator. In fact, the hose has a pass-through port in the Speed Bag, so nothing even has to come out of the bag in order to use the tank. Note: it is much easier to get the hose into the coupler on the regulator when there is no pressure.
Using the Power Tank to inflate tires or use air tools on the trail is simple.
Start by inserting the hose into the coupler on the regulator before adding pressure. While not impossible to get the hose in with regulator pressure, it makes it far simpler.

Open the top tank valve first to turn on the CO2 supply. The regulator knob on the right side is then used to set the line pressure.
For tires: Crank the side knob all the way up to 250 or 400 psi, depending on which regulator you purchased. Trust me when I say your tires will inflate faster than you expect, sometimes as much as two psi a second on smaller tires — so stop to check your inflation progress regularly until you get used to the speed. I have seen quite a few people blow WAY past their target pressure by a good amount the first time they use a Power Tank.
For air tool use: Air tools are a little different, but most expect about 100-150 psi line pressure — the gauge will read “static pressure” of the line while the tool is not in use. Based on how much volume of air the tool uses, this may drop when you start using the tool. This reading is known as “flow pressure.”
Watch the gauge and adjust the regulator knob to supply the correct flow for the tool to operate as it should. The typical variance between the two readings is around 20 percent for most tools.
If you ever need to refer to them, or if you let a friend borrow your Power Tank, there is an easy-to-read label on the back of the tank with basic operating instructions.

Once you are done using the Power Tank system, you should always shut it down by releasing the pressure stored in the regulator. Close the valve on the top of the tank, then release the pressure in the hose by using your inflator or air tool. Keep in mind, with the pressure cranked up all the way, the hose whip on your inflator can live up to its name. So, holding it in your other hand is the best way to keep this from happening.
After doing this, when both gauges read zero, you can easily turn the regulator knob on the side until it bottoms out.

Another thing that surprises some new users is how cold the Power Tank system can get when in use. The picture above is perfectly normal after refilling four large volume tires back to street pressure after a day on the trails.

This is completely normal, and depending on humidity, the tank can quickly freeze condensation on the outside of the bottle as CO2 is released.
After filling up 16 tires (four Jeeps worth!) this 20-pound system belonging to Daniel Oster of the Lake Region Jeepers had thick frost built up on the bottle on a rainy day. With a substantial ice build-up, it is crucial to handle the cold parts of your system while wearing gloves.
Other Articles That May Interest You:
Nine Essential Items For Your Jeep Winter Emergency Kit