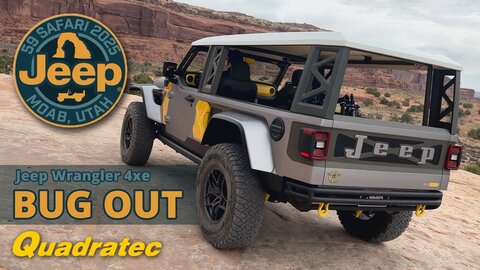
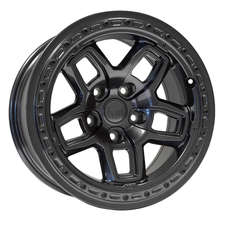
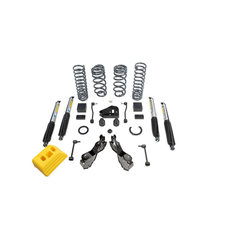
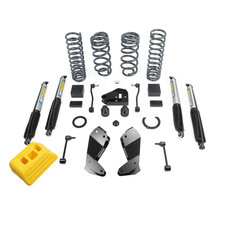
hey Rob here for Quadratec.com last week we got started on the build-up of Matt's 3-liter eco-diesel-equipped JL Rubicon while Matt was away at the SEMA show we had the opportunity to start stripping down his Rubicon getting rid of the front and rear bumper and getting those new AEV heavy duty differential covers installed on his axles to give him some added protection when he's out on the trail if you haven't yet had a chance to check out our coverage from the 2021 SEMA show you can click that info button to head over to the torque blog on the Quadratec website to read some great articles and coverage that Matt put together while he was out there well now that he's back here on the east coast i know he can't wait to get his jeep back so today we're gonna move on to getting the new suspension installed so here on the table i have AEV's two and a half inch Dual Sport Suspension i went ahead and got everything unpacked and all of the components laid out here on the table so we could take a closer look at them before i move on to the install AEV designs and engineers each of their suspensions to custom match any of the vehicle configurations available from the factory so they're taking into account things like whether you have a two-door or four-door Wrangler whether you have a gasoline or diesel clipped Wrangler or gladiator so yes the suspension on the table is designed to handle things like the extra weight of that heavy diesel under the hood of Matt's Wrangler of course we've also got new shocks extended sway bar end links all of our extended bump stops hardware and no you're not going to see any control arms on the table that's because AEV is utilizing their geometry correction brackets to keep everything in line with the front axle we'll come back and talk a little bit more about those when i'm installing them we've also got a rear track bar bracket and something unique to an AEV suspension is the inclusion of their extended jack base now this is going to allow us to continue to utilize that factory scissor jack that came in your Wrangler or gladiator by placing the jack on this base well it's going to account for the added height of our new suspension it also functions as a wheel chock should you ever need one a very unique inclusion that we only see from AEV finally we've also got their pro cal snap on the table a very great addition to the kit because it's going to allow us to recalibrate the vehicle's computer for larger tires things like gear ratios and even transfer case ratios so that we continue to have the correct readouts from things like our odometer and speedometer definitely important when we add larger tires with our new suspension now speaking of tires last week i revealed that Matt selected a set of 37 x 12.50 Mickey Thompson Baja Boss all-terrain tires for his Wrangler these tires are going to perform great whether Matt is simply asking them to handle daily driving duties or if he's putting them through more aggressive use when he leaves the pavement as for wheels i know i kept you guys on the hook well here it is Matt selected the AEV bora wheel for his build it is available in your choice of a satin black or like i have here the onyx finish which absolutely looks fantastic has a lot of flake in there and it's sure to look great on Matt’s Snazzberry Wrangler now you can run this wheel in multiple different configurations you see i do have a silver removable ring here in front of the wheel if we get that out of the way for just a moment you can run the wheel just like this in its bare state you could add the bolts around the lip if you like of course you would simply mount the bead of your tire behind the lip of the wheel for very traditional use now if you do need some added functionality from the bora you can move that outer bead of the tire to the outside lip of the wheel and then add AEV's true bead lock ring which of course is going to clamp that outer bead in place allowing you to run some extremely low tire pressures finally you have another option which match selected is to go ahead and utilize AEV's wheel protection ring now while this looks very similar to the true bead lock ring instead of leaving a gap here to clamp that outer bead of the tire and place to the face of the wheel it's going to sit nice and flush with the wheel once it's installed giving you the look of a bead lock but the added protection of a sacrificial ring here on the outside of the wheel to help protect the face of your wheel from damage now this gets scuffed up and gouged on the rocks Matt can always touch this up with some silver paint or if it gets really too bad he can simply take it off and replace it with a brand new ring altogether keeping his wheels looking fantastic for a very long time to come before i get started the first thing i'm going to do is go ahead and get the wheels and tires loaded up and off to the shop to get mounted and balanced and while they're over there and i'm waiting for them to get finished i can start tackling that suspension at this point we've got all of the factory components removed from our rear axle and i went ahead and got our track bar tower installed on the axle it utilizes existing factory holes for an easy bolt-on install as you can see it raises the attachment point for our track bar up three inches here on the axle now it's details like that they're going to help this suspension to maintain a factory like ride and handling characteristics now we've also got some extended sway bar end links that we're going to be installing here in the rear and if you have a gasoline equipped Wrangler you're also going to be installing some sway bar drop brackets now with the diesel Wrangler the def tank happens to be in this location so we're unable to drop the sway bar down instead AEV has us drill a second set of holes an inch higher here on the axle side for the sway bar end links to attach and again that's another detail that AEV has built into the suspension to really give you that high quality ride now i can go ahead and start getting our rear springs installed along with the shocks and then i'm going to leave all of the bolts for our control arms shocks and our rear track bar loose until i get the weight of the vehicle down on the suspension after we're completed our install at that point i'll come back and torque everything to spec from here we can move up to the front of the vehicle start by getting those springs and shocks out of the way disconnecting our control arms so we can move on to installing those geometry correction brackets so at this point i've got our new springs shocks sway bar end links and bump stops installed for the front suspension before we wrap up the install by installing our new geometry correction brackets i wanted to show you what the control arms look like in their current state now mine even though we are up on the lift here and the suspension is at full droop this should give you a pretty good idea of what makes these geometry correction brackets so important if we take a look at the angle of our lower control arm especially here for the front suspension you can see what a steep angle this is now in an ideal condition you want this angle as horizontal as it can be as parallel to the ground or as flat as possible with it in this steep angle like this what's going to translate to a much poorer than stock ride poor handling whether we're on the road or the trail imagine if you're hitting an obstacle either a rock or maybe a pothole with the angle of this control arm steep like this it's actually going to send all that energy up into the frame of the jeep translating to poor ride quality if we're able to flatten that out and we hit an object well now it's actually going to allow the suspension to cycle easier which is going to translate to better ride and handling if we take a look at the geometry correction brackets we'll see that we're going to be dropping down the mounting point for our upper control arm as well as our lower control arm and if you take a look at this new point you can see just how much flatter that's going to make our control arm here by flattening that out again we're going to get much better handling ride quality and it's going to effectively elongate our lower control arms pushing our axle towards the front of the vehicle back within factory alignment specifications giving us the correct caster angle which is going to help our jeep to track straight when we're headed down the road now while i got everything installed here up on the lift it's actually a lot easier to install your geometry correction brackets with your wheels reinstalled on your vehicle back down on the ground with the weight of the vehicle on the suspension by only working one side at a time it's going to prevent that axle from moving around too much on you allowing you a much easier job of getting the brackets installed and getting the control arms realigned and bolted to the brackets now here we are with the geometry correction brackets installed on the jeep and now you can see just what a difference it makes to the angle of our control arms everything has been flattened out much less severe of an angle here remember we're still at full suspension droop here on the lift so once the jeep's on the ground and that suspension compresses well the angle of our control arms is going to be virtually parallel to the ground which will translate into excellent on and off-road handling at this point why don't we go ahead get the jeep down on the ground so i can get those newly mounted and balanced wheels and tires installed on the jeep and get everything torqued and finish up our install the 37 1250 Mickey Thompson Baja Boss ATs look fantastic wrapped around those AEV Boron wheels together i think they complement the new suspension of Matt's jeep perfectly i like that AEV puts just as much design and engineering into their wheels as the rest of their products and the AEV bora features a hub centric design with 5.72 inches of backspacing that's a plus 25 millimeter offset and what that does is give us the room we need to run a larger 12 and a half inch wide tire while still keeping that tire and wheel tucked nicely under the fender without sacrificing things like balance handling or ride quality i also like this great recessed valve stem here on the board to help protect that valve stem from any chance of damage on rocks or obstacles out on the trail the last thing we got to do to finish off these wheels is to install that wheel protection ring but before we do that i think i've got something else special in store for those so you guys are going to have to wait until next time for those wheel rings if you guys like these videos and you haven't already do me a huge favor go ahead and hit that thumbs up button don't forget to hit that subscribe button as well as the notification icon so be sure to catch the next episode of our build up of Matt's ecodiesel equipped JL Rubicon next time we're going to be installing that AEV rx stubby front bumper and as always if you guys ever have any comments or questions about anything i installed on Matt's jeep today you can always do those for me down in the comment section below or contact us directly at any of the options on the screen until next time i'm Rob i'll see you guys out on the trail
AEV designs their 2.5" DualSport Suspension to specifically match your vehicle & engine combination, taking into account differences between the 2 door & 4 door Wrangler as well as the Gas or EcoDiesel engine options. Each kit includes springs, shocks, bump stop extensions, and geometry correction brackets to keep the front axle within factory alignment specifications. In this video Rob is continuing the build up of Matt's 3.0L EcoDiesel equipped JL Rubicon by installing the suspension along with a set of Borah Wheels & Mickey Thompson Baja Boss A/T Tires.
Shop Products in this video
6 results


Shop Brands in this video

Tags:
Comments