by Scott Ammerman
Torque Correspondent
Part One of Two — Before You Use Your New Winch:
After about three years of use, and several lost feet due to abrasion damage, the Spydura Synthetic Winch Rope on my Warn VR-10S winch was starting to look a little beat up. In addition to twice losing some length due to proactive hook end repairs, the heat wrap all the way at the drum side was damaged by pinch abrasion from doing a high angle pull against the fairlead — not a fault of the rope, just lack of careful use.

Because we often do recovery on mixed use trails (both full size and UTV/ATV), as well as in low light situations, I opted for something a little more visible this time than the standard gray Spydura — the Warn Spydura Nightline winch rope. This will stand out against the gray rocks of coal country, where the old rope had far more of a tendency to blend in with the surroundings.

This rope is two tone, black and red, and has a weave of light reflective tracer in it that shows up brightly when struck by light.
Since I already had a Factor 55 Flat Link E with a Factor 55 Standard Synthetic Rope Load Spool, I needed to remove the thimble on the end of this rope to go a soft eye splice. Due to the way the factory end splice was performed, it needed to be removed before installing the new rope, since the end that wraps around the drum had to be completely passed back through the splice.


Doing it this way allowed the factory tapered end to remain intact. I discussed the advantage of the load spool and illustrated the use of the Fast Fid tool in this article.
I had planned to just install this new rope on my existing winch, but also had been contemplating a winch upgrade for a while since my usage habits changed from occasional use (a few times a year) to more like a few times a month. I settled on a Warn Zeon 10, which had a few distinct advantages over my nearly three-year-old Gen II VR10-S.

A 27% upgrade in no load line speed, greatly decreased resistance when pulling the line out with the clutch disengaged, increased rope capacity on a wider aluminum drum, less electrical draw while in use and a IP68 waterproof rating made this a perfect upgrade choice now that my recovery priorities have changed.
With the Factor 55 Hawse Fairlead 1.0 already installed on the bumper, and the new Nightline Spydura rope, all I really needed was a steel cable WARN Zeon 10 Winch with 80' Wire Rope and Roller Fairlead (since you can’t buy them bare), which saved me a few hundred dollars.

Dropping this setup gave me 20’ more synthetic rope length, plus this lost about 23 pounds total between the rope and the roller fairlead. However, for some uses that steel aircraft cable can be preferable due to its increased durability.

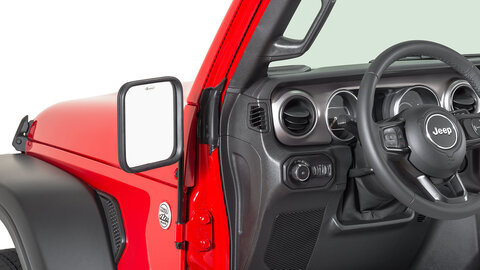
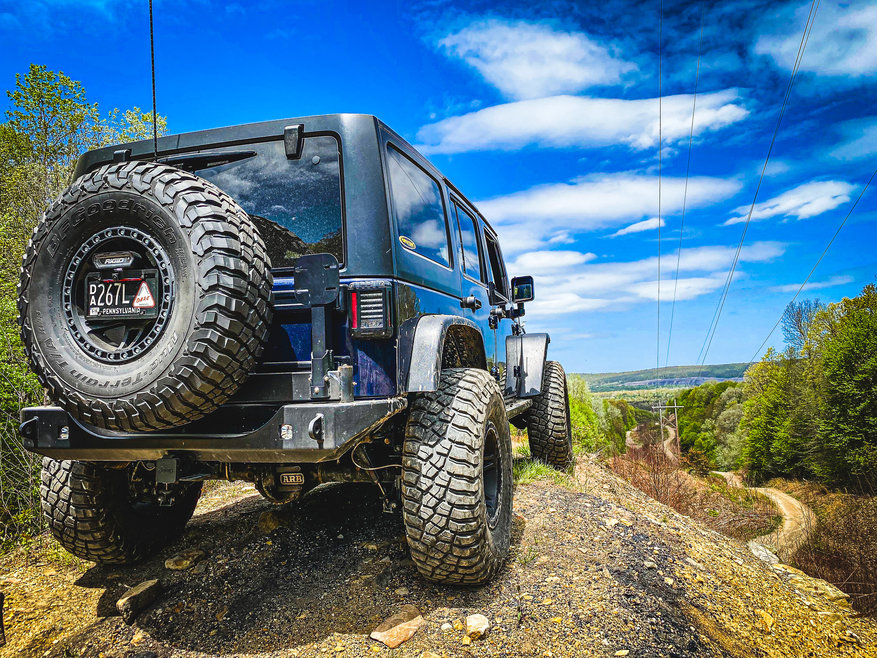
Rather than a flange screw and thimble (as pictured above) holding the line to the drum, the Zeon has the end of the wire rope passed through the drum, doubled over, and secured by a puck.
While a solid set up, many reviewers and commenters have had trouble installing a new synthetic rope on a Zeon winch when following the supplied instructions — they advise using a zip tie or wire to pull it through.
Seeing as how this has been problematic for so many people, we came up with what we consider to be a much better way. It is a super-tight friction fit, and much of the issue seems to stem from the rope being brand new and not stretched out.
These same instructions apply to installing a new or replacement Warn Spydura synthetic rope on a Zeon or Zeon Platinum winch, in any rated capacity. Also, it is not specific to Jeep models, and the winch being installed into the bumper or winch plate is not required, nor is hooking it up to power.
Some horror stories I have read include having to pull with another vehicle, a hoist or other apparatus. They also recommend greasing up the end or spraying it with silicone, which worked for some people while others said it wasn’t enough. Some even added it took multiple days of wrestling with the device before success was finally achieved.
Since I am installing the winch in a Hyline Offroad Summit Modular Front Winch Bumper with Recessed Winch Mount, the loop end of the rope has to be attached to the drum before the winch is installed, since it would be very difficult to work with the loop anchor puck through the hawse fairlead.

Keep in mind, the Zeon form factor is HUGE compared to many other winches, and may not fit with all mounts or bumpers — contact your manufacturer if you aren’t sure.

A Warn Zeon 10 (top) compared to a Warn VR EVO 8-S (bottom)
Hopefully, if you’re in the middle of struggling with this and you have found our article, then this solution helps you. You will need a second person to assist, as we’re going to be using a lot of leverage to get this accomplished.
Tools required (in addition to a friend, whom you should not call a “tool”:
- A medium sized hammer with a rubberized handle (or at least non-marring)
- 550 Paracord
- Glass Cleaner
- Work Gloves
- Something heavy (details below)
- A stable work surface that has room on both sides
First, the steel wire rope is not terminated in a closed loop at the drum side, so we needed to use a drift (or a ⅜ socket extension you don’t like) and the hammer to tap it free, then work the loose end out. The spurs on the end of the cable can easily puncture your hand, as I have learned a few times in the distant past. Save the puck (marked ⅜”) for installation of the Spydura rope.

These images are excerpts from the Warn Synthetic Rope Installation Guide for Premium, Ultra Performance and Zeon Winch Lines:


Although this appears quite simple, it seems to be the most problematic for many people. Trying to pull double the diameter of the rope through a narrow slot using a zip tie or wire seems like a cake walk, but friction and expansion of the rope as you pull seem to thwart even the best of efforts.
Here is how we solved the puzzle, and only needed a little bit of glass cleaner to lubricate the rope as we passed it through.
Using a high shelf with no sharp edges, we tied a trucker’s hitch knot in the rope so it could hoist a used differential center section into the air, suspended by a piece of 550 paracord passed through the loop end of the winch rope.
This thinner diameter cord is able to hold the weight, but is small enough that it stretches the rope to as much of a point as possible. We also chose the trucker’s hitch knot because we did not want to damage the rope using a knot that could lock if it was over tightened by suspending the weight.
There are instructional videos on how to tie this all over the internet, and my favorite on YouTube was produced by the team at REI for tightening tent guy lines.


Obviously you don’t need to have a spare differential laying around, as I’m sure most folks probably do not. As a substitute, a small craft boat anchor would work, or perhaps an Olympic weight. Anything small and heavy (note: please do not use children or pets) that can have paracord passed through it will work.
The important thing is that it has a loop to pass the cord through, and a weight of around 30-40 lbs. You also don’t need to have a 20-foot industrial shelf. You just need something tall enough with no sharp edges or abrasion points that a five-foot length of rope can be pre-stretched.
Let the rope thoroughly stretch for 20 minutes or so, then move over to the winch.
Using that same paracord, tie another loop through the winch rope loop so at least 12-15” of it can be passed through the rope anchor pocket. We sprayed a little bit of glass cleaner on the Spydura loop end to help things along.

With your assistant bracing the winch to keep it from moving, wrap the paracord around the handle of the hammer, overlapping a wrap to keep it locked. Turn the drum to the best straight line pulling angle you can get, and engage the clutch to keep it from spinning.
Using the leverage of the hammer head to twist it (kind of like a winch, right?) the rope loop should pass right through without much issue. Brace the handle of the hammer against the edge of the winch body — this is why we wanted a soft-handled hammer, to keep the winch’s finish safe from damage.
Remove your paracord loop, and insert the puck from below once you have pulled it through the anchor pocket enough.

Now, back to the next two steps in the Warn manual:


These make it seem easy as well, right? Once you’ve seen how much effort is required to pull it through the pocket, you won’t be fooled. Switch places (or jobs) with your partner, and do the same wrapping technique with the hammer, this time using the winch rope around the handle.

Also, note that the steel cable equipped Zeon models come with a ⅜” puck, and the installation manual indicates a 5/16” one is to be used (which is included with new Zeon S models). I called Warn to ask if mine needed replacement, and they assured me it did not.
Once you have it fully seated, and the rope loop end is flush with the drum, you are ready to spool the rope onto the winch. Without being pre-tensioned under load, the 100’ rope must be wrapped very cleanly to fit the drum without coming into contact with the winch mounting surface or the tie plate on the top side.
In part two, we will go through the steps needed to pre-tension your new Warn Spydura rope.