by Rob Jarrell
Quadratec Channel Staff Writer
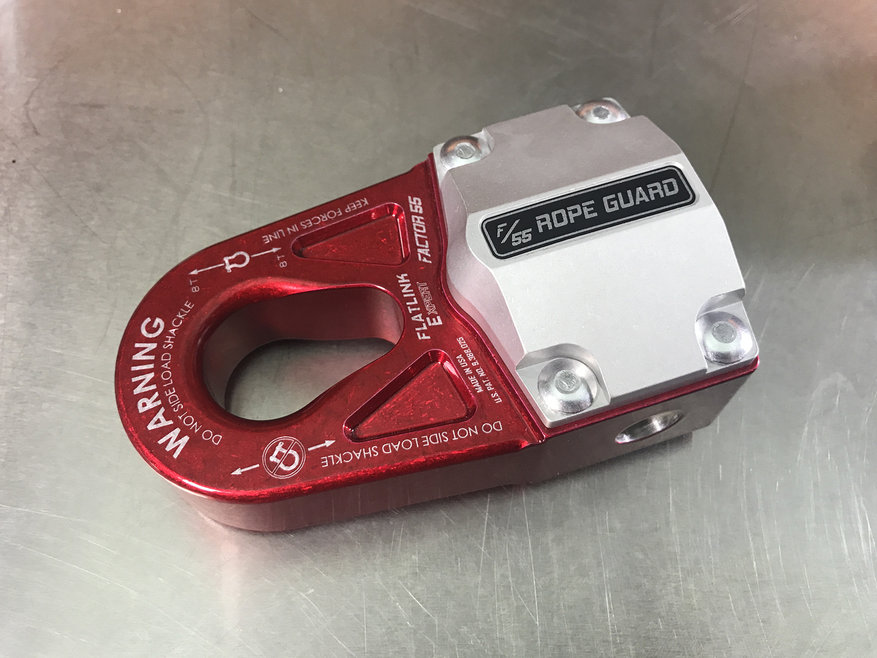
The Factor 55 Rope Guard is an accessory that installs on to any Factor 55 FlatLink or UltraHook to protect your synthetic winch line from UV damage as well as potential trail damage! Because the UltraHook is larger than the FlatLink line of products there are two different Rope Guards, each sized appropriately, so you'll want to be sure to purchase the correct Rope Guard that will work with your winch hook or shackle mount. The guard is made of heavy duty Kaiser 6000 series aluminum and clear anodized for the ultimate in corrosion protection, it will compliment your Factor 55 shackle mount beautifully. Installation is easy, and will only take a few minutes using some basic hand tools. The Rope Guard also includes the drive rivets necessary for installation, and just like the rest of Factor 55's great products, they're made in the USA! If you still need a winch or any winching accessories visit our winches page.
What You Will Need
- Factor 55 Shackle Mount or Winch Hook (FlatLink / FlatLink Expert / FlatLink MultiMount / Flat Splicer / UltraHook)
- Factor 55 Rope Guard (FlatLink Rope Guard / UltraHook Rope Guard)
- Flat Head Screwdriver or Nylon Pry Tool
- 1/4" Punch
- Hammer
- Window Cleaner or Soapy Water
Instructions
Start by gathering all the tools required. I will be installing the FlatLink Rope Guard on to a FlatLink Expert, however the installation steps are the same for all the Factor 55 products.

First I need to remove the rubber pads on both sides of the FlatLink. I prefer to use a nylon panel tool so it won't scratch the finish of the FlatLink. A flat head screwdriver will also work if you don't have a panel tool available. Just be careful not to gouge the finish of the powdercoating.

After removing all four pads, you're ready to proceed. You will be re-installing two of the pads. You can save the other two incase you ever need to replace a damaged pad in the future. The reason I removed the pads on the backside is to keep the FlatLink from bouncing when driving in the rivets in the upcoming step.

Be sure to orient the Rope Guard in the correct direction so the groove on the back of the guard matches with the FlatLink.

The guard can be installed on either side of the FlatLink. I chose to have the pin opening on the FlatLink facing down, and the Factor 55 logo so that it's readable when the FlatLink is pulled up against the fairlead.

Locate the supplied drive rivets used to install the Rope Guard. My Rope Guard came with one extra drive rivet... just in case.

Place the Rope Guard on the FlatLink, and insert the four rivets into the mounting holes.

When driving the rivets in with the hammer, it doesn't matter where you start, but you should drive them in a circular pattern. Strike each rivet once and continue around the guard so that they are all driven in equally. This will ensure the guard is seated flush against the FlatLink.

Hammer the drive rivet post using a 1/4" punch. Be sure to hold the punch firmly so it doesn't slip off the post and damage the Rope Guard.

Continue in a circular pattern until all four drive rivet posts are seated flush with the head of the rivet.

Before re-installing the 2 rubber pads on the back side of the FlatLink, lubricate them with window cleaner or soapy water to make it easier to re-insert the rubber barbs into the pad mounting holes.

Press the pads firmly to ensure they are both securely mounted to the FlatLink.

You installation is now finished. You can re-install your FlatLink or UltraHook back on to your synthetic winch line and rest easy knowing your winch rope is protected from UV damage and potential rock rash on the trail!